Will It Blend?
In my youth I was very enthusiastic about computer graphics, visual effects and such things. I was even considering trying to make a career out of it, until I went to study computer science. Around 2005-2006 I spent a lot of time learning how to use this open-source 3D modeling and rendering application called Blender, and some other related tools. Back then free learning resources weren’t as readily available, and proper video cameras were super expensive and hard to get for a teenager. Nowadays cheap smartphone cameras are ten times better than what was available back then.
When I started studying, adulting and entering work life, I put many previous passions and hobbies on the back burner, including 3D stuff. After graduating a few years ago I started making those things a part of my daily life again. After a long chain of various YouTube videos I ended up watching some videos about Blender, and boy has it evolved in the past 15 years.
I have always been excited about digital sculpting, and wanted to try it out in Blender. I have some previous experience from ZBrush, but Blender offers very similar tools now for free.
Choosing a subject was easy. The big cave troll was one of my favorite creatures from the Lord of The Rings movie trilogy, and I have tried modeling it once before, so I decided to run with it. I wanted to keep the scope down, so instead of a full body I started making just a bust.
I sculpted a rough model using the Dynamic Topology tools in Blender. It took me a while to figure out how to adjust the detail level properly without destroying previously sculpted geometry.
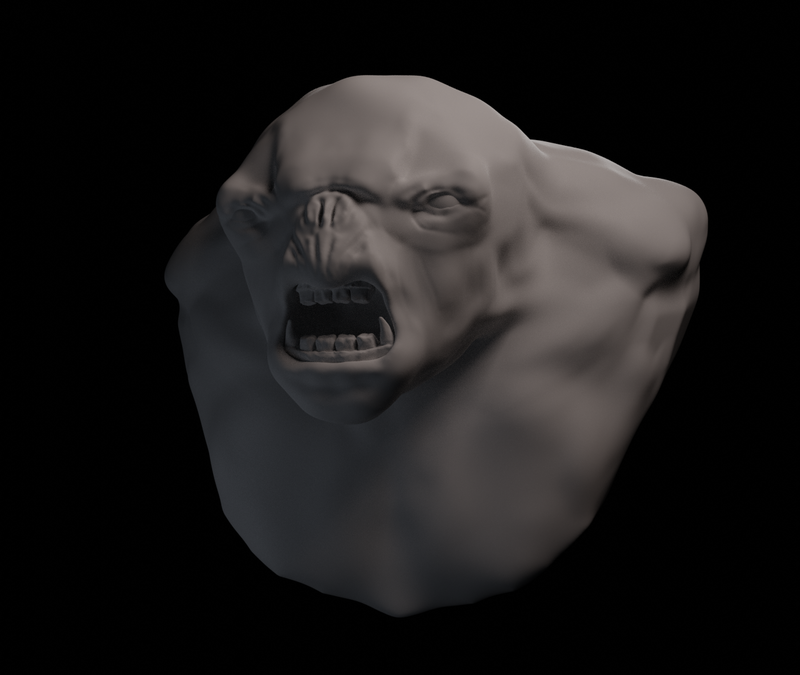
Once I had a rough model in place, I wanted to improve the topology before I start detailing and texturing the model. It was very easy to do with the help of the Shrinkwrap modifier in Blender. I created the most important polygon loops first and then started connecting them together to cover the whole bust. I had no intention of animating the model or anything, but I knew retopologizing everything would give me a better base for the smaller details, and would let me pose the model with less issues if I would feel like it later on.
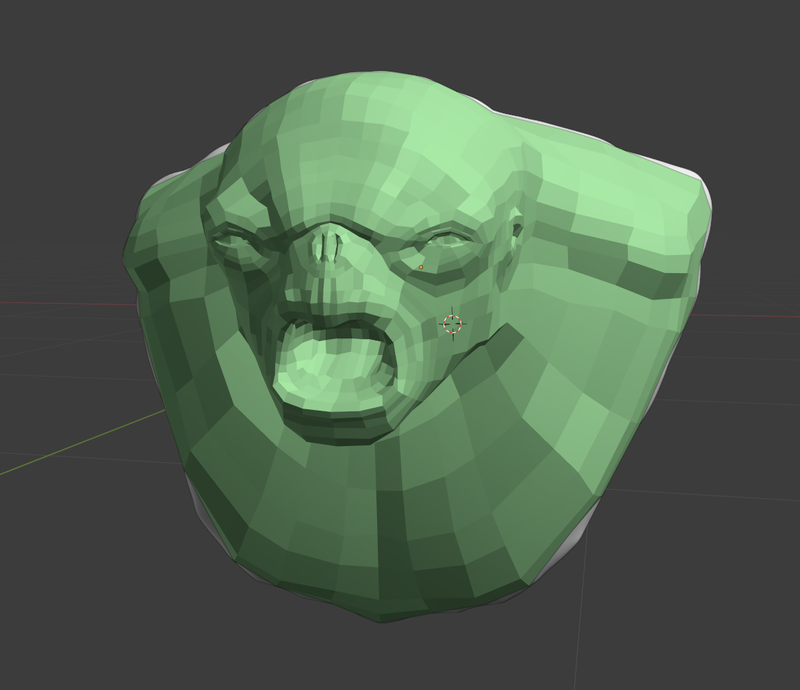
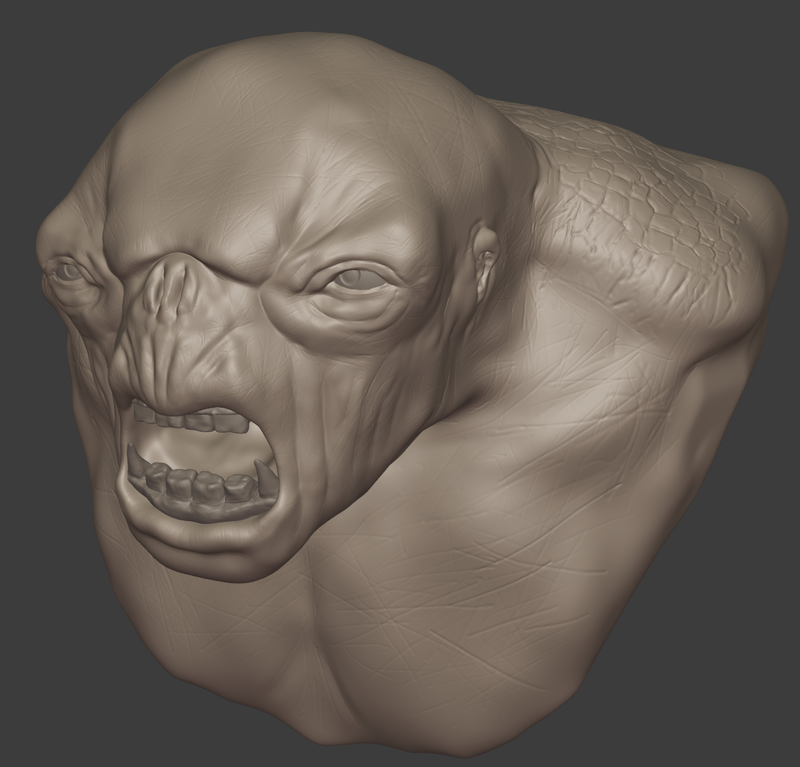
Once retopologizing was done, I subdivided the mesh using the Multires modifier, and started sculpting in details. I experimented with different texture based brushes to get wrinkles, scales and other skin details, but in the end mostly used the basic brushes and created the small patterns by hand.
After detailing the mesh I started painting a texture on the model. At first I had some performance problems when laying down the main colors with a big brush. Blender would start lagging a lot, until I turned down the visible resolution in the Multires modifier. All the tiny detail would still be there but I wouldn’t see it during texturing. To get different colors for the small wrinkles and crevices in the skin, I used some shader magic and baked the result into a texture that I could then use to modulate the colors.
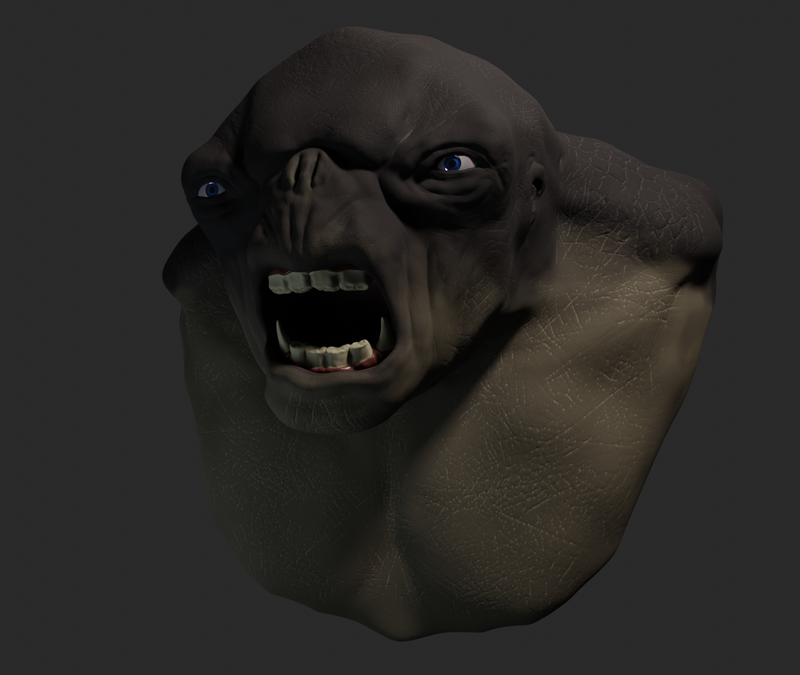
At this point I actually created a simple rig for posing the model and orienting the eyes, but then couldn’t come up with any pose that would look natural, so I left it as it is. It’s anyway a bust, so it’s pretty natural that it is in a static and symmetric pose. Making a dynamic pose without arms or most of the torso is difficult.
I quickly modeled a super simple pedestal for the bust, and textured it with a stone texture from Texture Haven. Finally I lit the whole scene with an HDR image texture from HDRI Haven.
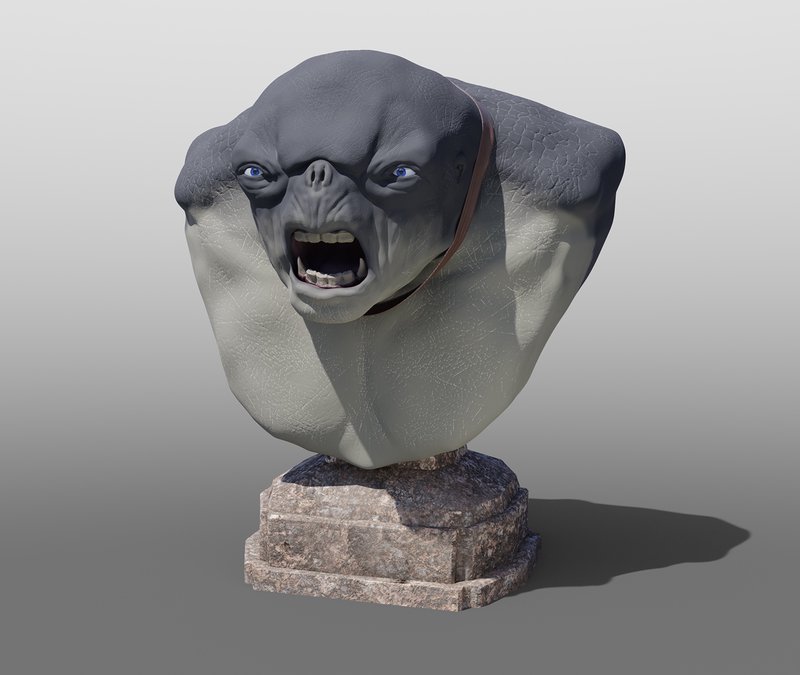
I’m pretty pleased with the end result, considering that I haven’t touched Blender in ages. I wish I would have exaggerated the cracks and wrinkles in the skin more, but that’s a good lesson for next time. I’m super stoked to continue experimenting with Blender and seeing what I can come up with!